How to Transfer Your Domain to Google in 2026: The Simple Guide

Introduction: Streamlining Your Digital Assets
Think about your business online. Your website, your email, your landing pages. Each one likely lives at a different domain name. Now, where do you keep the keys to all those doors? If you are like many entrepreneurs, the answer is messy. A domain at GoDaddy, another at a random hosting company, maybe one still at the old developer’s account.
This haphazard approach is more than just inconvenient. It creates real problems.

You face higher renewal fees from multiple providers. You juggle different login details, which is a security risk. You waste precious time just trying to remember where everything is. For a solopreneur focused on growth, this fragmented system steals the time and mental energy you need to scale.
You are not alone in managing a growing portfolio. Domain registrations continue to rise steadily, with millions added each year as more businesses establish their online presence. In fact, a recent survey of active domain investors found that a vast majority maintain portfolios of 50 domains or more. This trend is not just for big investors. As an affiliate marketer building multiple sites, you are effectively a domain portfolio manager. Your domains are core digital assets, and they deserve a secure, integrated home.
This is where consolidation becomes a powerful strategy. Instead of letting your domains live scattered across the web, bringing them under one trusted roof simplifies everything. It enhances security, cuts unnecessary costs, and gives you back control.
This guide is your clear, trustworthy roadmap to do exactly that by learning how to transfer your domain name to Google. We will focus on what matters most for your affiliate business in 2026: robust security, seamless integration with the tools you use, and setting up a system for long-term efficiency. Let’s turn domain management from a chore into a strategic advantage.
Why Transfer Your Domain to Google in 2026? (Beyond the Basics)
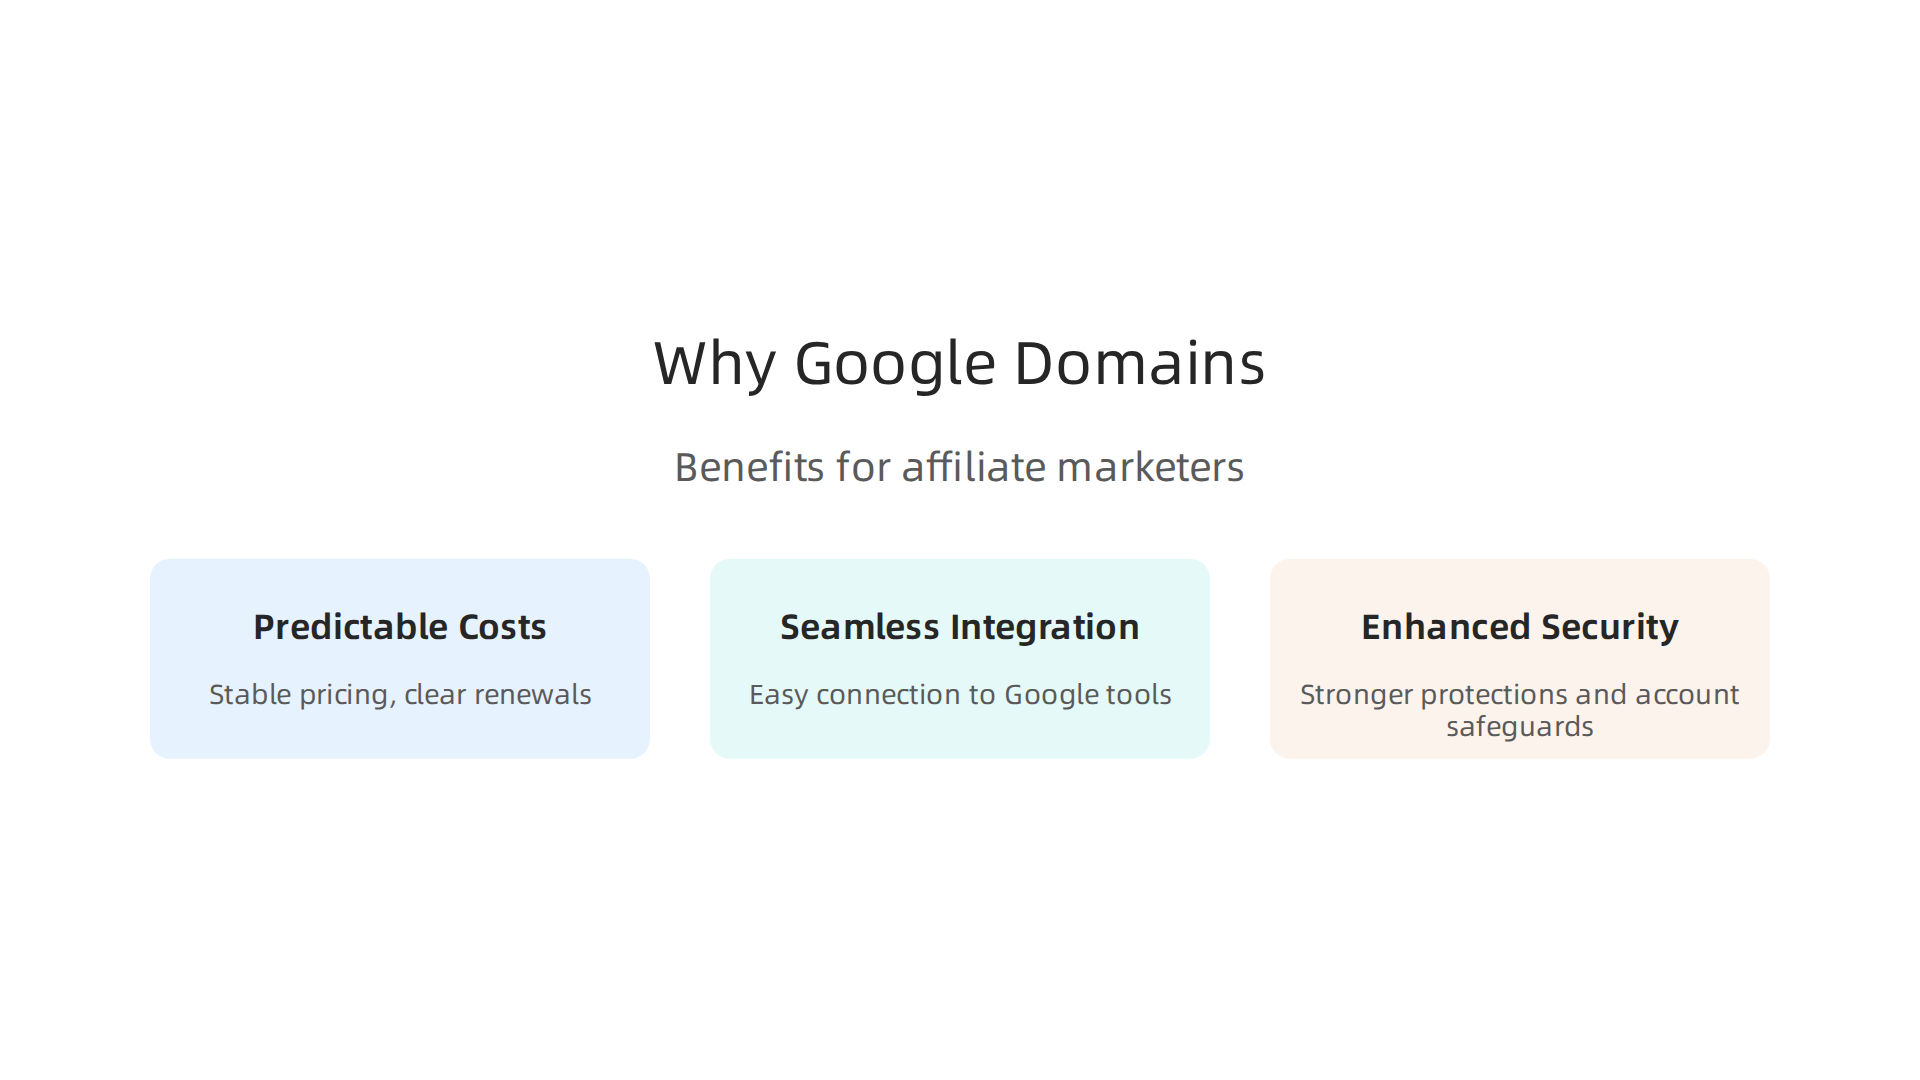
You know consolidation is a good idea. But why choose Google specifically? The reasons go deeper than just having one login. For an affiliate marketer in 2026, the decision hinges on three powerful advantages: predictable costs, effortless connections to your growth tools, and ironclad security.
Let us break down why this move is a smart business strategy.
Cost-Effectiveness and Transparency
Hidden fees and surprise renewal prices are a drain on your budget. When your domains are scattered, you are likely overpaying. A key benefit of transferring your domain name to Google is straightforward, competitive pricing.
While some registrars lure you in with a low first-year price only to hit you with a much higher renewal fee, Google’s structure is transparent. For popular domains like .com, their transfer and renewal rates are consistently competitive. How does it stack up? In 2026 market comparisons, services like Google Domains often position themselves favorably against other mainstream options. For example, analyses show that while providers like Porkbun or Cloudflare can be very affordable, Google offers a strong balance of price and premium integration you cannot get elsewhere.
The real savings come from simplification. One bill, one renewal date, and no more hunting for coupons across five different accounts. This predictability lets you manage your operational expenses like a pro.
Seamless Ecosystem Integration
This is where the magic happens for your affiliate business. Your domain is not just an address. It is the hub that connects to your most critical tools. Managing it within the Google ecosystem removes frustrating technical barriers.
Think about your daily workflow. You likely use Google Search Console to monitor site performance and rankings. You might use Google Workspace for professional email. Perhaps you explore Google Cloud services for hosting or advanced analytics. When your domain is registered with Google, connecting these services is often a one-click affair.
No more digging for DNS records or waiting for changes to propagate from a separate registrar. You verify ownership instantly. You set up email without complex MX record edits. This deep integration saves you hours of technical hassle each month, time you can reinvest into creating content and building partnerships. If you have ever struggled with how to transfer a domain name from GoDaddy to Squarespace or another platform, you will appreciate the streamlined experience of keeping everything under one cohesive roof.
Enhanced Security and Reliability
Your domain is a prime target. Losing control of it could sink your business. Entrusting it to an infrastructure giant like Google brings enterprise-grade security to your solo venture.
Google builds robust protections directly into its domain management platform. This includes mandatory two-factor authentication (2FA) to prevent unauthorized account access. They support DNSSEC (Domain Name System Security Extensions), which helps protect your visitors from malicious redirects and spoofing attacks. These are not just checkboxes. They are critical defenses that maintain trust in your brand.
Furthermore, reliability is paramount. Google’s global network ensures that your domain’s DNS—the system that directs traffic to your website—is incredibly resilient and fast. This means less downtime and faster loading speeds for your audience, which is a direct ranking factor for search engines. For an affiliate marketer, a secure, always-online domain is non-negotiable.
In short, transferring your domain name to Google in 2026 is about investing in a stable foundation.

It is a move that saves you money, supercharges your productivity with better tool integration, and locks down your most important digital asset with top-tier security. It turns domain management from a risky chore into a strategic pillar for growth.
Pre-Transfer Checklist: Avoiding Costly Delays and Mistakes
Ready to move your domain? A smooth transfer depends on what you do before you click the "start transfer" button. Skipping these checks is the main reason transfers fail, leaving your website offline or your email broken. Do not let that happen. Here is your essential pre-flight checklist for 2026.
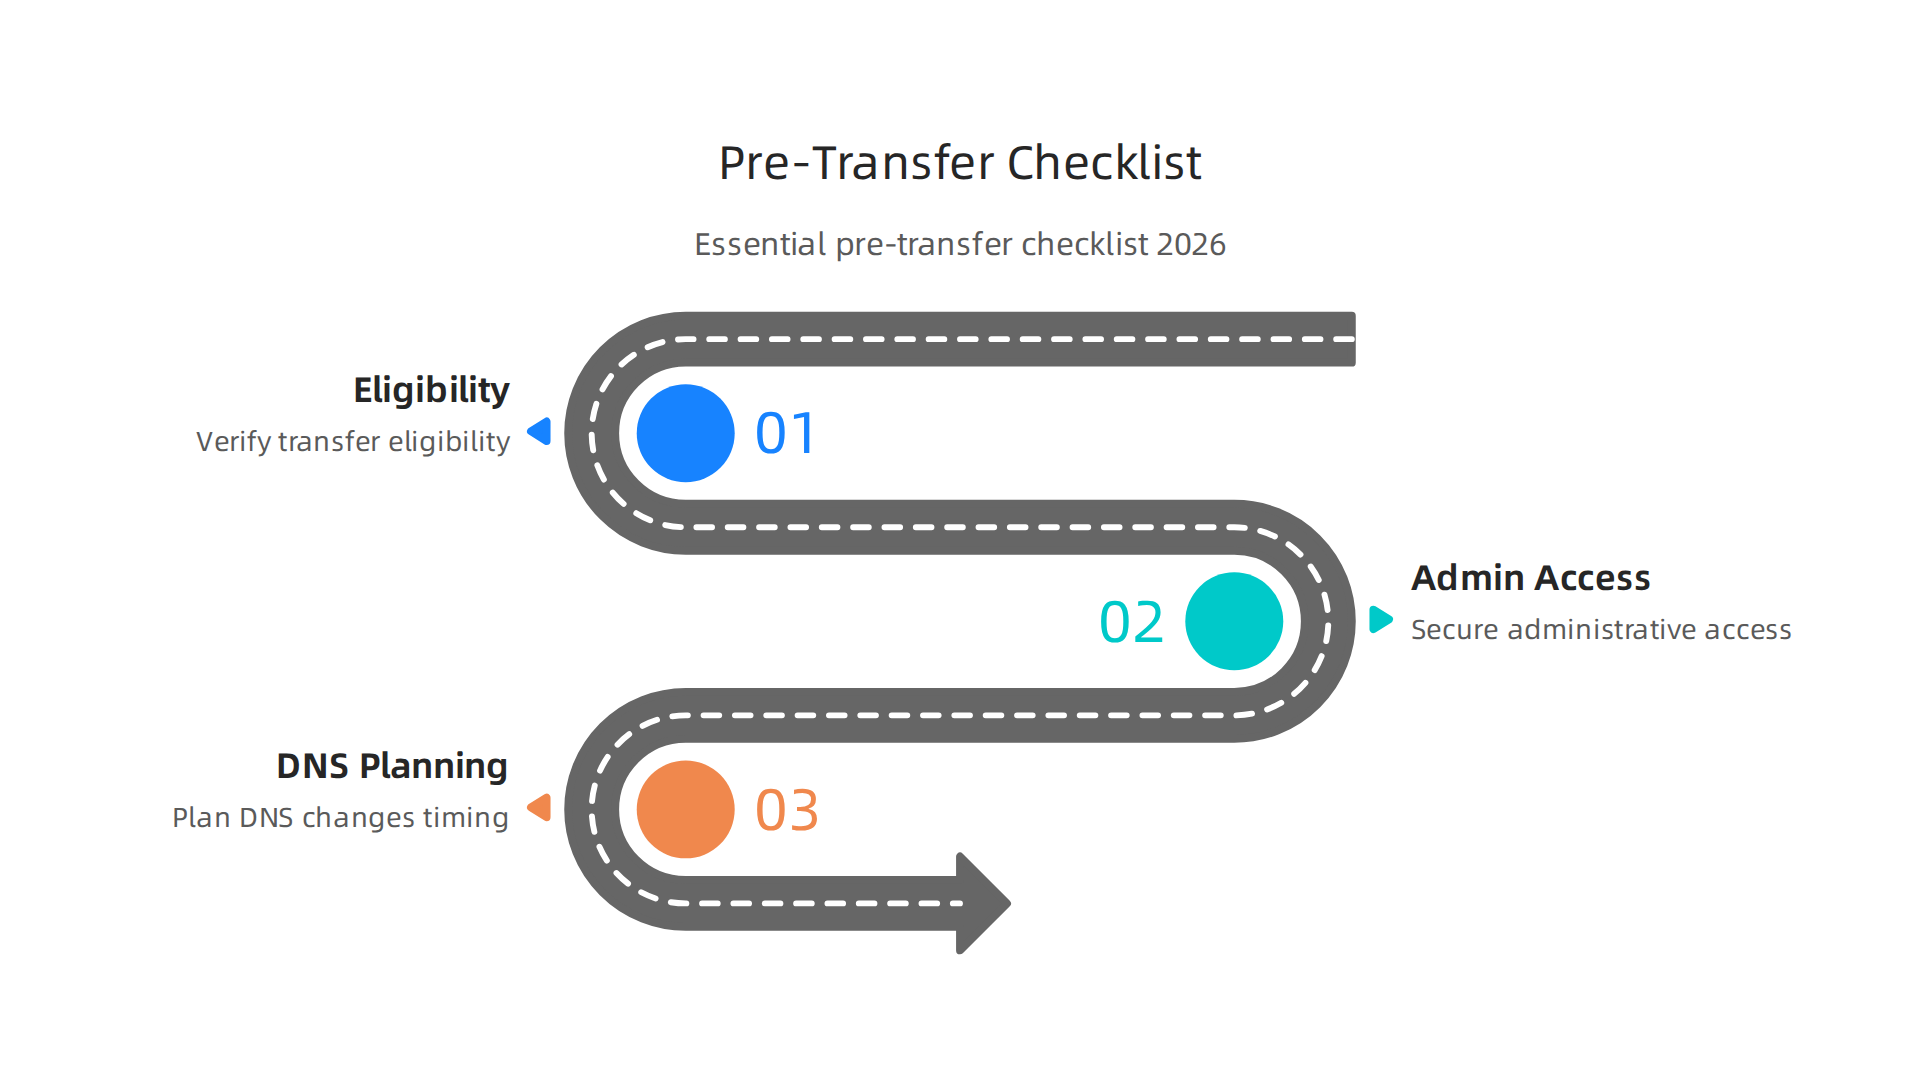
1. Verify Your Domain is Eligible to Move
Not every domain can be transferred at any time. International rules set by ICANN control the basics. You must confirm these three things first.
- Is it unlocked? Domains have a transfer lock to prevent unauthorized moves. You must disable this lock in your current registrar’s control panel. Look for a setting called "Domain Lock," "Transfer Lock," or "Registrar Lock" and turn it off.
- Is it older than 60 days? A domain cannot be transferred within 60 days of its initial registration or a previous transfer. Also, if you recently updated the registrant’s name or email, a 60-day lock is triggered. As ICANN’s policy states, you generally cannot transfer a domain name to a new registrar within 60 days of making a change to your contact information.
- Is it active and not in redemption? Ensure your domain is not expired or in a redemption grace period. An expired domain cannot be transferred. If it’s expired, renew it with your current registrar first, then wait out any new 60-day lock that renewal might create.
2. Secure Your Admin Contact & Authorization Code
This step is the most common stumbling block.
- Admin Email Access is Critical: The transfer approval request will be sent to the domain’s registered administrative contact email address. You must have access to this inbox. If you do not know which email is listed, check your registrar’s WHOIS information or account dashboard first.
- Get Your EPP Code (or Transfer Secret): This is the unique password for your domain. It has different names: EPP code, authorization code, or transfer key. You must obtain this from your current registrar. Log into your account (like GoDaddy, Namecheap, etc.), find your domain, and look for an option to "Get Authorization Code" or "Request EPP Code." It may be emailed to the admin address. Have this code ready before you start the transfer process at Google.
3. Plan for DNS and Email Before the Switch
Your website and email live where your domain’s DNS records point. The transfer process itself does not automatically move your website. If you do not plan, your site can go offline when the transfer completes.
- Document Your Current DNS Records: Before doing anything, take a screenshot or write down all the current DNS records in your old registrar’s DNS management zone. Look for A records (pointing to your web hosting IP), MX records (for email), CNAME records (for subdomains), and TXT records (for verification).
- Plan for Email Continuity: If you use email services linked to your domain (like Google Workspace, Outlook, or a third-party host), your MX records control this. You will need to re-create these exact records in Google Domains after the transfer to keep email flowing without interruption. A step-by-step guide on moving your domain often highlights this critical planning phase.
- Consider Timing: The actual transfer can take 5 to 7 days. Your website will continue to work from the old DNS settings until the transfer fully completes. Once the domain is at Google, you will update the DNS records there to point to your hosting. This is also the perfect time to consider automating more of your business. Managing a successful affiliate site requires streamlined systems, much like using structured methods to automate content and growth, freeing you from daily technical hassles. You can explore tools that support this efficient workflow via our Fitbar affiliate link.
By checking these three boxes—eligibility, access, and DNS planning—you turn a potentially nerve-wracking process into a simple, predictable task. Now you are ready to initiate the transfer with confidence.
Step-by-Step: The Complete Transfer Process to Google
You have completed your pre-flight checks. Your domain is unlocked, you have your authorization code, and your DNS records are documented. Now comes the main event: moving your domain name to Google. This process is straightforward when you follow the steps in order. Let’s walk through each phase together, from start to finish.
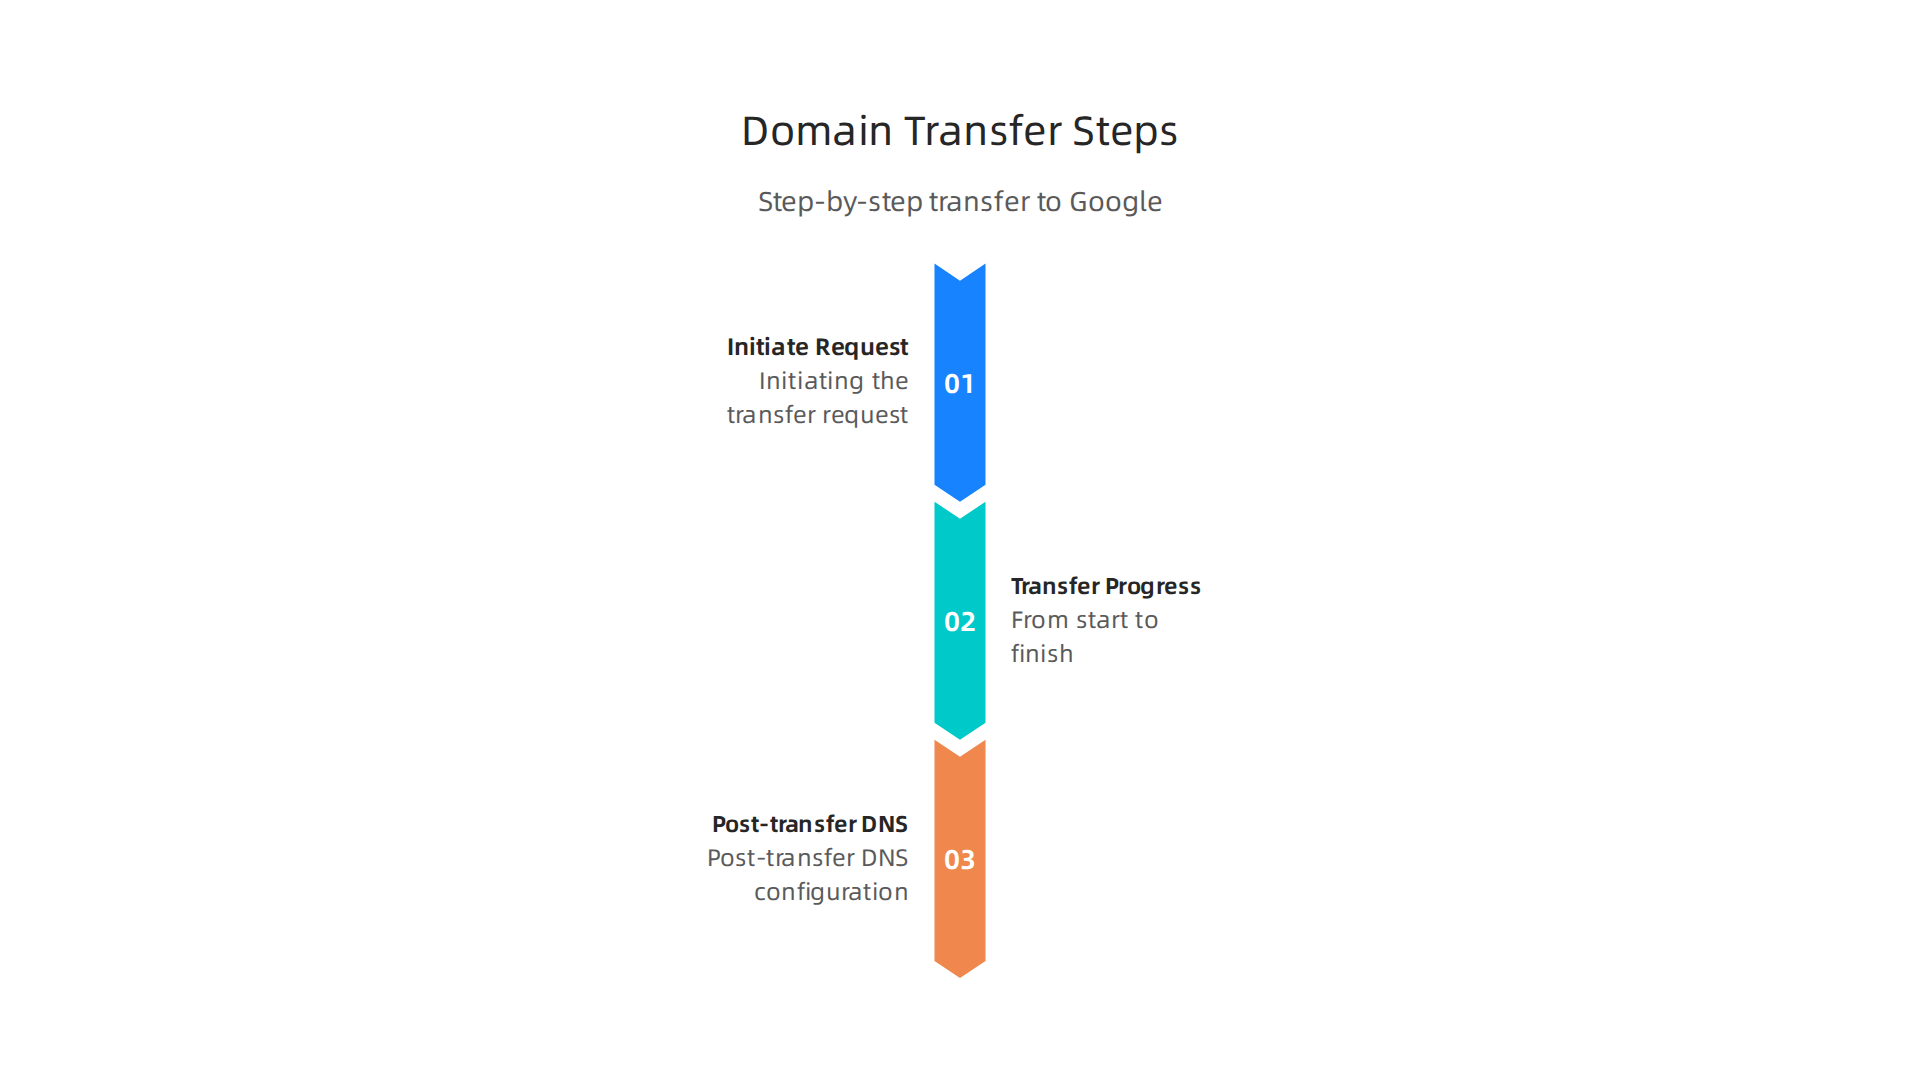
Initiating the Transfer from Your Google Account
The transfer starts not with your old registrar, but with your new one. You are asking Google to pull your domain over.
- Go to Google Domains. Sign in with the Google Account you want to manage the domain with.
In the top-left corner, click "Register a domain." On the next page, look for and click the link that says "Transfer a domain" or "Transfer in."
2. Enter Your Domain Name. Type the exact domain you want to transfer (like yourdomain.com) into the search bar and click "Search." Google will check if it is eligible for transfer. If you did your pre-check correctly, it should show as available.
3. Provide Your Authorization Code. This is where you use that EPP or transfer code you got from your old registrar. Paste it into the required field. A detailed guide on transferring a domain from GoDaddy to Google emphasizes that entering this code correctly is crucial for a smooth start.
4. Complete the Purchase. You will be asked to review the transfer order and make a payment. This payment covers an additional one-year renewal of your domain registration, added to your existing expiry date. After you pay, Google will formally request the transfer from your current registrar.
At this point, the request is sent. The next step happens in your email inbox.
Approving the Transfer Request (Email Confirmation)
Your old registrar will not let the domain go without your explicit approval. This is a key security step.
- Watch the Admin Email. Within minutes or a few hours, an approval request email will be sent to the domain’s administrative contact email address. Check your inbox (and spam folder) carefully. The email subject will be something like "Transfer Approval Required" or "Authorization Request."
- Click the Approval Link. Open the email from your current registrar (like GoDaddy, Namecheap, etc.). It will contain a unique link or button to approve the transfer. Click it. You may need to log into your old registrar account to confirm.
- Do Not Ignore This Step. If you do not approve the request, the transfer will be automatically canceled after about 5 to 7 days. According to Google Workspace Help, getting and acting on this email is a required step that your new host (Google) cannot do for you.
Once you click approve, the countdown begins. The actual transfer can take anywhere from a few hours up to 5-7 days to fully complete. Your website and email will continue to work from your old DNS settings during this time. For a visual walkthrough of this entire approval process, this 2026 video guide on transferring from GoDaddy to Google can be very helpful.
Post-Transfer Configuration in Google’s Interface
When the transfer is finished, you will get a confirmation email from Google. Now, the domain is officially under your control in Google Domains. The final step is to point your domain to your website and email again.
- Access DNS Settings. In your Google Domains dashboard, click on your newly transferred domain. Then, select "DNS" from the menu on the left.
- Re-create Your DNS Records. This is where your pre-planning pays off. Using the screenshot or notes you took earlier, add all the necessary records.
- A Record: Point your domain (the "@" record) to your web hosting provider’s IP address.
- CNAME Records: Add records for
wwwor other subdomains. - MX Records: Enter the mail server addresses for your email service (like Google Workspace, Outlook, or another host) exactly as they were before. This is critical to restore email flow. A good step-by-step guide on moving your domain always highlights reconfiguring MX records as a top post-transfer priority.
- Verify Your Website and Email. After updating the DNS records, it can take 24-48 hours for the changes to spread across the internet. You can then visit your domain to see if your website loads and send a test email to ensure everything is working.
With your domain now securely in Google Domains and your website live, you have successfully navigated the technical move. This is a great achievement. Managing an online business involves mastering these technical systems, much like using structured methods to automate content and growth, which frees you from daily technical hassles. You can explore tools that support this efficient workflow via our Fitbar affiliate link. Your digital asset is now in a new home, ready for the next phase of your online journey.
Critical Post-Transfer Setup for Affiliate Marketers
Congratulations. Your domain name to Google transfer is complete. Your website is loading, and basic email is flowing. For most people, the job is done.
But for you, an affiliate marketer, this is where the real work begins. Your domain is more than an address; it’s the foundation of your trust, traffic, and income. A few missed steps here can silently kill your email deliverability, break your analytics, and even cause you to lose your domain. Let’s lock things down properly.
Re-pointing DNS for Your Affiliate Site (Beyond the Basics)
You’ve added the main A and MX records. Now, let’s ensure your affiliate business runs smoothly.
- Email Authentication is Non-Negotiable: If you use a custom email for outreach (like
contact@yourdomain.com), you must prove you’re not a spammer. This means setting up SPF, DKIM, and DMARC records in your Google Domains DNS. These records tell receiving mail servers your emails are legitimate. A guide from Infraforge notes that after a domain transfer, setting up SPF, DKIM, and DMARC is critical and should be verified with online tools. Missing this step means your affiliate partnership emails or newsletters could land in the spam folder. - Double-Check Every Record: It’s easy to make a typo. A best practice highlighted by LeadConnector is to manually cross-check all your DNS records against your notes or previous provider. Pay special attention to long TXT records for services like Google Workspace or Microsoft 365.
Verifying Domain Ownership in Key Platforms
Transferring your domain can sometimes reset verification statuses. You must prove you own the domain all over again to these essential services.
- Google Search Console: This is your window into how Google sees your affiliate site. Go to Search Console, add your property, and choose the "DNS verification" method. Google will give you a unique TXT record to add to your Google Domains DNS. Official Google Workspace documentation explains the general process to verify your domain with a TXT record.
- Google Analytics 4: If you use a GA4 property tied to your domain, ensure the data stream is correctly connected. Re-verification here is less common but worth checking.
- Affiliate Networks & Ad Platforms: Platforms like Amazon Associates, ShareASale, or Google Ads might need reconfirmation. Check your account for any alerts. Often, simply having your site live on the domain is enough, but some may require a new verification file upload.
Automating Renewals and Enabling Security
Your affiliate income depends on this domain. You must protect it.
- Enable Auto-Renewal: In your Google Domains dashboard, find the auto-renewal setting and turn it ON. This is the simplest way to avoid the disaster of an expired domain. According to ICANN’s rules, your registrar is responsible for providing clear renewal information, but the final action is yours.
- Turn On Two-Factor Authentication (2FA): Secure your Google Account with 2FA. If someone hacks your email, they can steal your domain and your entire business. This takes two minutes and is your strongest shield.
- Review Privacy Settings: Google Domains offers free domain privacy with registration. Ensure it’s enabled to keep your personal contact information out of public WHOIS databases, reducing spam and targeted attacks.
Taking these steps transforms your domain from a transferred asset into a secure, verified, and reliable business tool.

Think of it as setting up the automated systems for your content and growth. Just as structured methods free you from daily hassles, a properly configured domain works silently in the background, supporting your affiliate revenue. You can explore comprehensive systems for building this kind of efficient, automated workflow through our Fitbar affiliate link. Now, your digital foundation is not just new. It’s fortified.
Troubleshooting Common Transfer Issues
Even with perfect planning, sometimes a domain transfer to Google Domains hits a snag. Your website and email are your business, so any hiccup feels like an emergency. Don’t panic. Most issues have a clear cause and a fix you can handle yourself.

Let’s walk through the most common problems and how to resolve them.
Transfer Stuck or Rejected
You submitted the transfer, paid the fee, and now… nothing. The status is "pending" for days. Or worse, you get a rejection email. This is frustrating, but it’s usually due to a small, fixable issue at your old registrar.
Here are the top reasons and how to fix them:
- The Domain is Locked: Registrars often have a transfer lock to prevent unauthorized moves. You must manually disable this in your old account’s control panel. As noted in troubleshooting guides, a locked domain is one of the most frequent causes of a stalled transfer.
- Incorrect Authorization Code: The EPP code or transfer key is case-sensitive and must be entered exactly. If the transfer is rejected, double-check this code. A common solution is to go back to your old registrar and request a new, valid EPP authorization code.
- WHOIS Privacy or Info Mismatch: If your domain has WHOIS privacy enabled, you may need to temporarily disable it. Also, the administrative contact email on file must be valid and accessible, as approval emails are sent there. Failing to ensure your domain registration information is correct and public can block the process.
- Domain is Too New or Too Old: You cannot transfer a domain within 60 days of its initial registration or a previous transfer. Also, a domain must have more than a few days left before expiration. Check your domain’s age and expiry date.
What to do: Log back into your old registrar’s dashboard. Disable the transfer lock, confirm your contact info, and if needed, get a fresh authorization code. Then, you can restart the transfer process in your Google Domains account.
Website or Email Downtime After Transfer
The transfer is complete, but now your site won’t load, or your email has stopped. This is almost always a DNS issue, not a problem with the domain itself.
Here’s your action plan:
- Wait for Propagation: DNS changes can take anywhere from a few minutes to 48 hours to spread across the internet. If it’s only been an hour, be patient. Use a free global DNS checker tool to see if your new records are visible worldwide.
- Verify Your DNS Records: Once the domain is at Google, it uses Google’s DNS servers. You must re-create all your essential records (A, AAAA, CNAME, MX) in the Google Domains DNS settings. A single typo in an IP address or mail server hostname will break things. As highlighted in a Google support thread, after a transfer, you are often stuck until you can reconfigure the MX records and wait for them to propagate.
- Double-Check Nameservers: If you are using a third-party hosting service (like AWS, Cloudflare, or a specific web host), your nameservers should point to them, not to Google Domains. Ensure the custom nameservers are correctly entered in your Google Domains settings.
When to Contact Support
You’ve checked everything, but the problem persists. Now it’s time to call in the experts. Knowing who to contact saves you time.
- Contact Your OLD Registrar If: The transfer hasn’t started or is stuck in "pending" status. They need to approve the release. Issues like a domain lock you can’t remove, an invalid authorization code, or a pending renewal on their side are their responsibility. As advised by other registrars, when common checks don’t resolve the issue, contact your current provider with your domain and transfer details.
- Contact Google Domains Support If: The transfer shows as "rejected" by Google, you have billing issues with Google, or you need help navigating the Google Domains interface after the transfer is complete. If the domain is already showing in your Google Domains account but services are down, that’s also a good time to check their help resources.
Solving these technical glitches is part of building a solid online business. Once your domain transfer to Google is smooth and stable, you can focus on what really matters: growing your affiliate income. For entrepreneurs, the next step is often systemizing that growth. A structured, automated approach can turn the complex process of affiliate marketing into a reliable workflow, freeing you to focus on strategy instead of daily hassles. You can learn more about building such a system through our Fitbar affiliate program.
Comparing Google to Other Popular Registrars for Entrepreneurs
Once your domain is safely transferred and running, you might wonder: was moving to Google Domains the best long-term choice for my business? It’s a great question. Google is a solid option, but it’s not the only player in the game. Let’s compare it to other top registrars in 2026 to see where it stands.
Feature and Price Comparison
For an entrepreneur, cost and features are key. Here’s a quick look at how Google Domains stacks up against some popular alternatives for a standard .com domain.
| Registrar | Typical .com Price (2026) | Best For |
|---|---|---|
| Google Domains | ~$12/year | Google ecosystem integration, straightforward interface |
| Cloudflare Registrar | Registry cost (~$10.46/year) | Pure, unbeatable pricing with zero markup |
| Porkbun | ~$11.08/year | Beginner-friendly low costs and good service |
| Namecheap | Promo: ~$6.49, Renewal: ~$18.48 | First-year discounts and bundled hosting deals |
As you can see, if the lowest possible price is your absolute top priority, Cloudflare Registrar is often the winner, charging only the registry fee. Competitors like Porkbun also offer modestly cheaper rates than many for popular domains. Google Domains is competitively priced but not the cheapest.
The Integration Advantage
So why would an entrepreneur choose Google? The answer is seamless integration. If your business already lives on Gmail, Google Workspace, or you rely on Google Analytics and Search Console, having your domain with Google simplifies everything.
- Unified Management: Your domain, email, and website analytics can be managed from interconnected Google accounts.
- Easy Setup: Configuring services like Google Workspace email is often a one-click process.
- Familiar Interface: If you’re comfortable with Google’s clean design, you’ll find the DNS and settings panels intuitive.
For a solo entrepreneur or small team deeply invested in Google’s tools, this cohesion can save more time and hassle than saving a few dollars a year elsewhere.
When to Consider an Alternative
Google Domains is excellent for many, but here are scenarios where another provider might be a smarter fit:
- You Need Advanced DNS: If you run complex online applications, a provider like Cloudflare offers incredibly powerful DNS and security features far beyond basic registrar needs.
- You Manage Many Domains: Some registrars offer significant bulk discounts or better multi-domain management dashboards.
- Price is the Primary Driver: If you’re bootstrapping and every dollar counts, opting for a budget-friendly registrar like Porkbun or Cloudflare from the start makes financial sense. Comprehensive reviews can help you compare the leading domain registrars on price and features.
Choosing where to host your domain name is a foundational business decision. It’s about more than just annual fees. It’s about choosing a partner that fits your workflow. For holistic business growth, this strategic thinking applies everywhere. Just as you systematize your domain management, you can systemize your entire affiliate marketing strategy to work efficiently on autopilot. Exploring a structured approach, like the one offered through the Fitbar affiliate program, can help turn your online assets into a streamlined, automated business.
Summary
This article is a practical, step-by-step guide for transferring a domain to Google Domains with an affiliate marketer’s needs in mind. It explains why consolidation with Google matters—predictable pricing, deep integration with Google tools, and stronger security—and walks you through pre-transfer checks like unlocking your domain, confirming it’s older than 60 days, and obtaining the EPP/authorization code. The guide details initiating the transfer from your Google account, approving the request via the admin email, and re-creating DNS and MX records after the move to avoid downtime. It also covers critical post-transfer tasks such as SPF/DKIM/DMARC setup, verifying ownership in Search Console and analytics, and enabling auto-renew and 2FA for protection. Troubleshooting tips address common problems like locked domains, incorrect auth codes, and DNS propagation issues. Finally, the article compares Google Domains to other registrars so you can weigh price versus integration and choose the best long-term home for your digital assets.
Related Articles